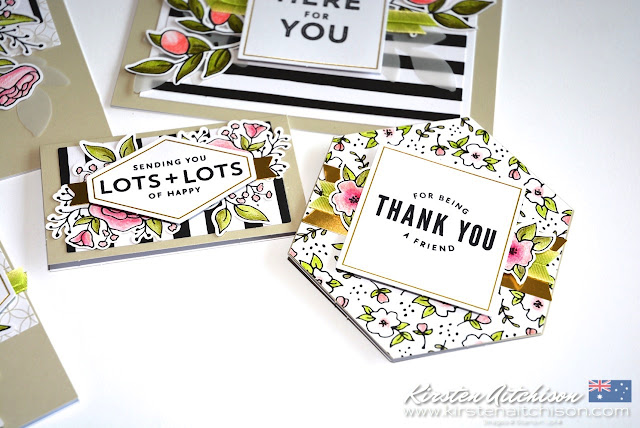
If this sounds like you, then you should consider trying out one of the Stampin' Up! all-inclusive card kits.
These kits include everything you'll need to create 20 cards. The only extra things you'll need are scissors for any ribbon/twine and your favourite adhesive.
If you love the kits and want to make more cards, there are refill kits available which only include all the consumable items from the full kit, so you don't have to pay for another stamp set, ink pad, clear block, etc. You just re-use those items from the original kit to make up your additional cards.
********************
Today I want to show you the Lots of Happy Card Kit. This kit includes everything you'll need to make a total of 20 cards - 4 each of 5 different designs. Plus you get a pretty kraft storage or giftable box that it all comes in.
Here is what you'll get in the box:
Here are the contents opened up and spread out:
The kit includes an instruction booklet showing what components to use on each card and how to put each one together.
********************
First thing to do is grab those full size watercolour pencils and colour the printed and die cut accents.
Tip: The watercolour pencils aren't labeled, so I just wrote each colour on the pencil using my White Stampin' Chalk Marker.
Next step is to stamp the sentiments on the white and gold foil labels. You can use the included clear block and Basic Black Archival Stampin' Spot.
The best thing about using the Stamparatus is that if the stamped sentiment isn't perfect or is a bit light, you can add more ink to your stamp and stamp it again in exactly the same spot and make it darker.
Here are a couple of photos using the Stamparatus for the sentiments in this kit:
 |
| Line up your stamps |
 |
| Place the clear hinged Stamparatus plate over the stamps and press to adhere the stamps |
 |
| Add the magnets to your labels sheet to hold it in place |
 |
| Ink up the sentiment stamps and flip the plate over onto the label sheet and press down |
 |
| Lift up the plate and all your sentiments are done. Re-ink and repeat above steps for a darker image |
 |
| Repeat the above steps to stamp the remaining sheets. |
The final steps are to assemble the cards as shown in the instruction booklet with the included card bases, ribbon, printed and die cut pieces, using the included Stampin' Dimensionals and your favourite adhesive. I used some multipurpose liquid glue and a little bit of snail adhesive.
********************
Here is a set of the completed cards, 1 of each of the 5 designs included. If you love these cards, you have everything you need to make 3 more of each.
I only made 1 set of the cards as per the instructions as I wanted to see what else I could do with the pieces. I'm still playing, however I'll share what I come up with as soon as I am done.
Thanks so much for your support and for visiting me today :)
If you enjoy what I do, I would love you to Like and Follow my Facebook page, and Pin my cards on Pinterest (or you can follow me on Pinterest).
Also, don't forget to sign up for my Blog updates via email and never miss a post.
Also, don't forget to sign up for my Blog updates via email and never miss a post.
If you like these cards, it would make my day if you left me a comment.
Just scroll to the bottom of my post, leave your comment and you will put a smile on my dial :)
You too can make these .......
Here is a list of the supplies and tools used:
Click on a product link to head on over to my Australian online store to purchase your supplies.
Australian customers: Join my free Customer Rewards program by making a purchase through my online store. Click here for more details.
**If you do make a purchase, be sure to use the current Hostess Code on your order to receive a free gift from me. Click here for the current code.**
 Lots Of Happy Card Kit (146388) |  Lots Of Happy Card Kit Refill 145605 |  SU Stamparatus (148187) |  Tuxedo Black Memento Ink Pad (132708) |  Multipurpose Liquid Glue (110755) |  SU Snail Adhesive (104332) |
Sign up for my Stampin' Up! Newsletter here
Receive a handmade card and thank you gift when you use the
current host code when placing an order through my online store.
The NEW Stampin' Up! 2018 Holiday Catalogue is here
View the new catalogue PDF by clicking here
Click here to shop for these amazing new products now
 |  |  |  |  |


No comments:
Post a Comment
Thank you for taking the time to leave me a comment. You have made my day :)